질문 분류
컴고수 레미쯔회원님들 안녕하십니까 포맷 후 간편하게 레지스트리 파일로 세팅완료하시는분 계신가요?
컨텐츠 정보
- 1,670 조회
- 2 댓글
- 목록
본문


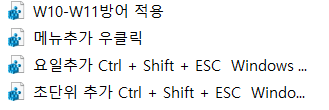
순서대로
윈10에서 11로 업데이트할거냐는 문구 제거
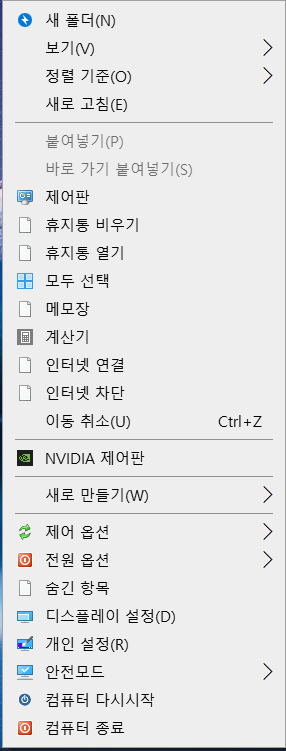
메뉴 우클릭에 제 입맛대로 커스텀된 레지스트리
우측하단 시계 요일추가
우측하단 시계 초단위 추가
이 정도로 나름 포맷이후 필요한 레지스트리를 만들어 사용하는데요
고수님들은 이런식으로 간편하게 포맷후 세팅하시는 나름의 방법이 있으시다면
두서없이 편하게 말씀주시면 감사하겠습니다!
관련자료
댓글 2
/ 1 페이지
ez0445님의 댓글
USB를 부팅 USB로 만든 후 autounattend.xml 파일을 만들고 원하는 레지스트리 파일을 autounattend.xml 에 지정하면 됩니다.
(주의) 수정하고자 하는 윈도우 설치파일에 이미 autounattend.xml 파일이 생성되어 있다면 주의하여 수정해야 합니다.
부팅 USB 최상위 경로에 '_reg' 라는 폴더가 있고, '_reg' 라는 폴더 안에 '1234.reg' 파일과 '5678.reg' 파일이 있다고 가정하면 autounattend.xml 파일의 샘플 코드는 다음과 같습니다.
▼▼▼▼▼▼▼▼▼▼이 밑으로 코드입니다. (이 줄은 복사 금지)▼▼▼▼▼▼▼▼▼▼
<?xml version="1.0" encoding="utf-8"?>
<unattend xmlns="urn:schemas-microsoft-com:unattend">
<settings pass="specialize">
<component name="Microsoft-Windows-Shell-Setup" namespace="urn:schemas-microsoft-com:unattend">
<FirstLogonCommands>
<SynchronousCommand>
<CommandLine>cmd /c regedit /s %systemdrive%\_reg\1234.reg</CommandLine>
<Order>1</Order>
<Description>Apply first registry settings</Description>
</SynchronousCommand>
<SynchronousCommand>
<CommandLine>cmd /c regedit /s %systemdrive%\_reg\5678.reg</CommandLine>
<Order>2</Order>
<Description>Apply second registry settings</Description>
</SynchronousCommand>
</FirstLogonCommands>
</component>
</settings>
</unattend>
▲▲▲▲▲▲▲▲▲▲이 위로 코드입니다. (이 줄은 복사 금지)▲▲▲▲▲▲▲▲▲▲
<CommandLine></CommandLine> 사이에 있는 코드 중 \_reg\1234.reg 처럼 되어 있는 부분을 수정하여 사용 하시면 되고, <Description></Description> 사이에 있는 코드는 그냥 주석같이 태그 달아놓는거라서 마음대로 입력하셔도 됩니다.
만약, 일일이 파일을 옮기는게 귀찮으시다면 ISO 파일에 직접 파일을 추가하여 질문자님 만의 튜닝 ISO를 만드셔도 됩니다.